Turning a seminar PPT into an explainer video is not a matter of animating slides. Slides rely on a presenter to add context; a video must carry that context in a fixed order, without questions from the room.
That difference matters when AI is involved. A tool can help organize material or suggest a visual, but a polished output can still contain an unsupported fact, a misleading diagram, or a confident summary that changes the meaning of the source. The student remains responsible for what the video teaches.
The safest method is to connect every important statement to both a source and a scene. Think of this as the claim-source-scene triangle.
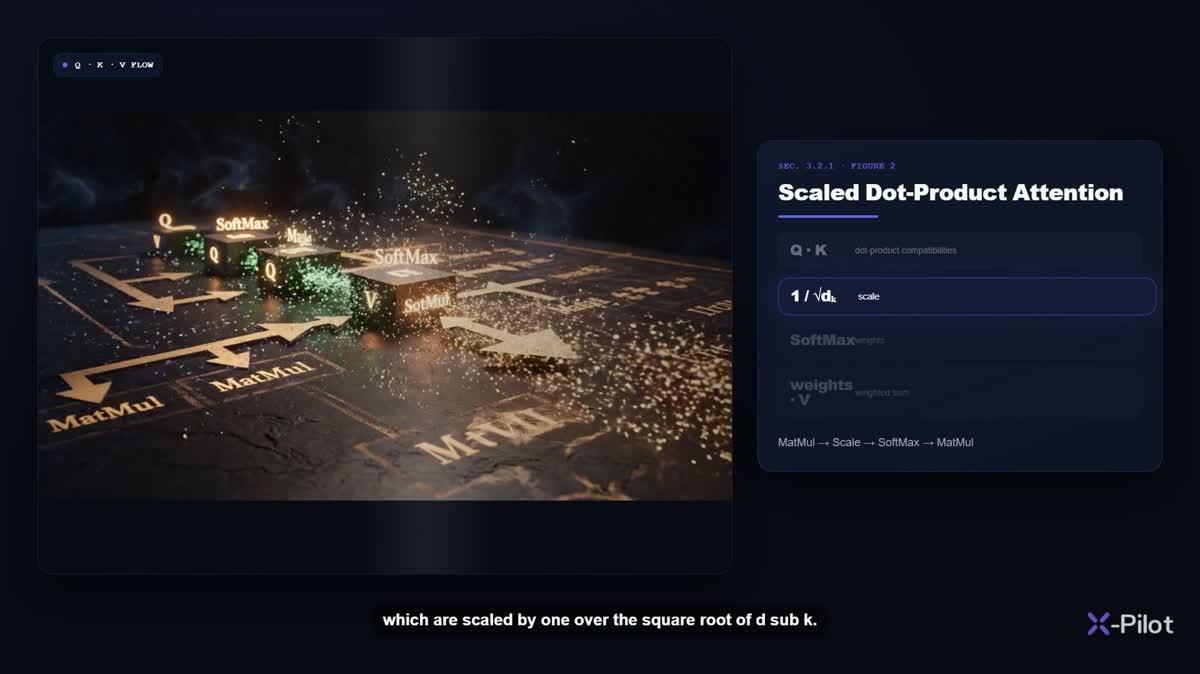
Figure 1. A real explainer frame can combine imagery, notation, and narration, but each element must still be checked against the seminar’s cited sources.
Start With a Seven-Minute Scope
Seven minutes can be enough for one focused seminar question, but not an entire subject. Before editing the PPT, write one learning objective:
After watching, the viewer should be able to explain, compare, identify, or demonstrate ______.
Use a verb that describes an observable result. “Know artificial intelligence” is too broad. “Explain how a decision tree chooses a split” is manageable.
At a calm speaking pace, a seven-minute narration may contain roughly 850 to 1,000 words. Treat this as a planning range, not a target that must be filled. Technical terms, equations, and diagrams need pauses, so a difficult topic may require fewer words.
Choose five to seven parts:
- The question or problem.
- Essential background.
- The main mechanism or process.
- A concrete example.
- A limitation or common error.
- The conclusion.
Remove the college logo animation, long acknowledgements, agenda repetition, and any slide that does not help answer the chosen question.
Build a Claim-Source Worksheet
Open the PPT and copy every statement that a teacher could reasonably ask you to defend. These are not only statistics. Definitions, dates, causal explanations, formulas, technical capabilities, and comparisons are also claims.
Create a worksheet with five columns:
- Claim in your own words.
- Original source.
- Exact page, section, table, or figure.
- Date checked.
- Status: verified, needs revision, or remove.
Prefer course textbooks, standards bodies, peer-reviewed research, government publications, and official technical documentation. A search result snippet is not a source. A blog that provides no evidence should not be the only support for an academic claim.
If a claim cannot be traced, do not ask AI to “make it sound academic.” Remove it or return to the library and find a suitable source.
Convert Claims Into Scenes
Now design the video scene by scene. Each scene should have one main claim. That makes mistakes easier to spot and explanations easier to follow.
Use this scene card:
Scene number:
Claim:
Source and page:
Narration:
On-screen text:
Visual:
What the viewer should understand:
Review status:
The narration should explain the claim. The visual should show a relationship, process, comparison, or example. The on-screen text should highlight only the terms the viewer needs to follow.
For example, a seminar on solar cells might include:
- Claim: A photovoltaic cell converts light energy into electrical energy.
- Source: The assigned physics text, chapter and page.
- Narration: A short explanation of the photovoltaic effect.
- Visual: A labeled path from incoming photons to charge movement.
- On-screen text: “Light energy -> charge movement -> electric current.”
Do not use an AI-generated scientific image as proof. If exact anatomy, circuitry, historical evidence, or experimental results matter, use a properly licensed source image or create a diagram from verified information.
A production workflow can help only if it preserves that scene-level accountability. X-Pilot’s editable PPT-to-video workflow can start from a seminar deck or other supported material and propose editable outlines and scenes for review, preview, and MP4 export. The student still owns the claim-source worksheet and every factual check.
Match Words and Visuals Carefully
A decorative animation of a robot does not explain machine learning. A moving background does not clarify a chemical reaction. The visual should help the viewer build the same mental model described by the narration.
Useful scene patterns include:
- Sequence: Reveal steps one at a time.
- Comparison: Place two methods under the same criteria.
- Cause and effect: Use arrows only when the causal relationship is supported.
- Zoom and focus: Highlight the exact part being discussed.
- Worked example: Show one calculation or decision from start to finish.
Keep labels consistent. If the PPT uses “training data,” do not switch to “learning database” in the video unless the source treats them as equivalent.
Write Narration That Adds Context
Do not read the slide text aloud. The viewer can already see it. Narration should connect ideas, define terms, and explain why the visual matters.
A reliable pattern is:
- State the question.
- Give the necessary fact.
- Explain the visual.
- Connect the fact to the next scene.
Read the script aloud before producing the video. Long sentences that look acceptable in a report often become difficult to follow when spoken. Replace vague words such as “this,” “it,” and “things” when the reference is not obvious.
For unfamiliar names, scientific terms, and abbreviations, add pronunciation notes. Expand an abbreviation the first time it appears.
Review the Draft in Three Passes
Pass 1: Academic review
Check every scene against the claim-source worksheet. Confirm that:
- the narration does not make a stronger claim than the source;
- dates, units, formulas, and labels match;
- quotations are exact and attributed;
- the conclusion follows from the evidence;
- limitations have not been removed to save time.
Pass 2: Visual review
Pause on each diagram. Ask whether a classmate could misread it. Check axes, arrows, legends, scale, color meaning, and the order in which elements appear.
Generated visuals deserve extra attention because they may look convincing while representing the concept incorrectly.
Pass 3: Full preview
Watch the video without the PPT beside you. Look for abrupt jumps, repeated explanations, text that disappears too quickly, and references such as “as you can see above” that no longer make sense.
Add a Reference Frame and Submission Notes
End with a concise reference frame containing the most important sources. If the full list is too long for seven minutes, include it in the video description or accompanying PDF.
Keep a small submission record:
- video title and version;
- source worksheet;
- final script;
- image permissions;
- date of final fact check;
- exported MP4 filename.
This record helps if a teacher asks how the video was produced or if a fact needs correction later.
Final Checklist
Before submitting, verify:
- The video answers one focused seminar question.
- Every major claim has a source and page or section.
- Each scene explains one main idea.
- Generated content has been reviewed rather than trusted automatically.
- Visuals match the narration and do not act as evidence.
- The runtime is close to seven minutes without rushed speech.
- Captions, terminology, units, and references are correct.
- The MP4 was watched after the final export.
Conclusion
The goal is not to make a PPT move. It is to create a short explanation that a viewer can understand and a teacher can verify.
The claim-source-scene triangle provides a practical boundary. Claims come from evidence. Scenes make those claims visible. Human review keeps the video aligned with both. AI may help prepare a draft, but academic responsibility cannot be delegated to the draft.